
Connecting to a Microsoft Excel File (.xls extnesion)
NOTE: This will require that you have Microsoft Excel installed on your computer.
Linking to the Excel File in e/Forms
1. Click on the database tab of the Client
Information window.
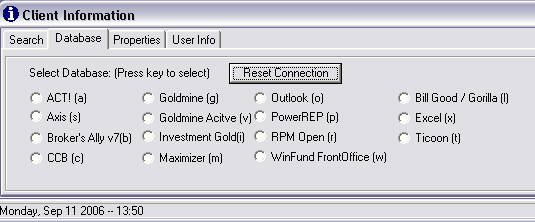
2. Click on the Excel option. (Database tab shown above)
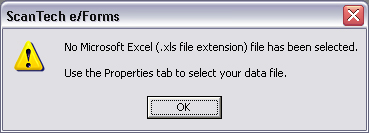
(This window will be shown when you select Excel as
the database option.)
3.
Click on the properties tab
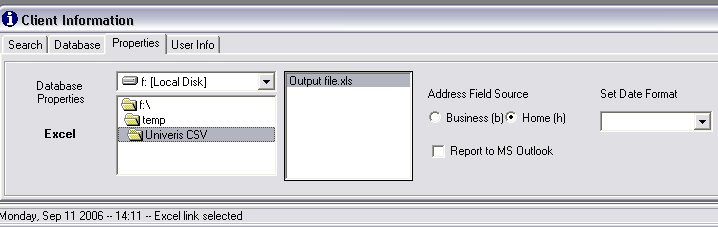
4. Double click on the file that you have just converted file created by Excel.
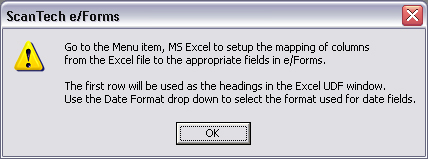
(After clicking OK a menu item will appear on the
top of the screen to the right of File, labelled MS Excel.)
5. Finally click on the MS Excel -> Set User Defined Fields.
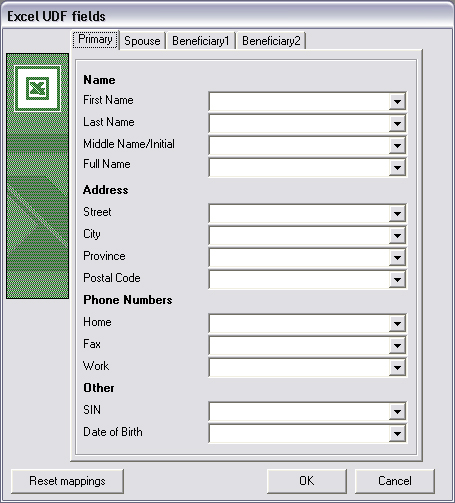
This window will map the fields from the Excel File into e/Forms. Select the appropriate field names from the drop down list boxes to link to the correct data from the Excel file. After that has been done then the names will appear in the Search tab of the Client Information window.
Potential Problems that may occur
Go to the Search tab and its empty
also will get message in bottom left
hand corner, stating time and date and '0 Records retrieved'
The Excel file needs to be modified
1. Make a backup before continuing. This is
a precautionary measure
2. Look at the first few rows, 2nd and subsequent. (The first row is
headings for each column)
3. Delete all the rows where the first 2 columns are blank.
4. Make sure there are no blank rows between the heading row and data
rows.
5. Save the file. (Then select that file in Properties if the
filename changed.)
Please note that the entries that were previously
in the first few rows will not be accessible in e/Forms.